Saturday, October 24, 2015

Fixing a Hole Where the Rain Gets In


Now that the windows were firmly in place, we fixed our cladding permanently. It looks like a simple job, but it took us days and days. Because our structure is transportable, we used screws to fix the cladding. Apparently, cheaper nails are used in conventional house builds.

With walls on and a five-day clear spell on the way, we were ready to climb to greater heights: the roof! On top of our ply ceiling, we screwed down roof purlins to hold the insulation and also to give us something to screw our roofing iron into.

Steff: The days were unseasonably dry, but icy. For many days, I was stationed up on the roof, passing things back and forth. I had a great time contemplating the view and watching the long winter shadows travelling across the site, and it was nice to be outside in the sun, but not getting burned. This part of the build was undoubtedly exhausting, especially as I was using strange and unknown balancing muscles. I also found myself seriously dehydrated by the end of the first day with the cold, dry wind. Four metres up in the air is not where you want to have balance and cognition issues, so I made sure to bring plenty of water for everyone for the rest of the roof days. In between the flurries of activity, my time on the roof was very peaceful. 

Nancy: Being on the roof was by far the most terrifying part of the build for me. I'm not typically afraid of heights, but once the iron was in place, there was nothing to hold onto if one were to lose one's balance. I didn't like climbing the ladder to the roof, I didn't like leaning over the edge to fasten the iron in place with our roofing screws, and I especially didn't like trying to get back down again. The weather was lovely, and there were a few moments when I was far enough from the roof edges that I appreciated the tranquility and quiet (you couldn't hear anyone or anything down below from the rooftop). For the most part, though, I spent those five days tense and cranky, and with a heightened sense of self-preservation.
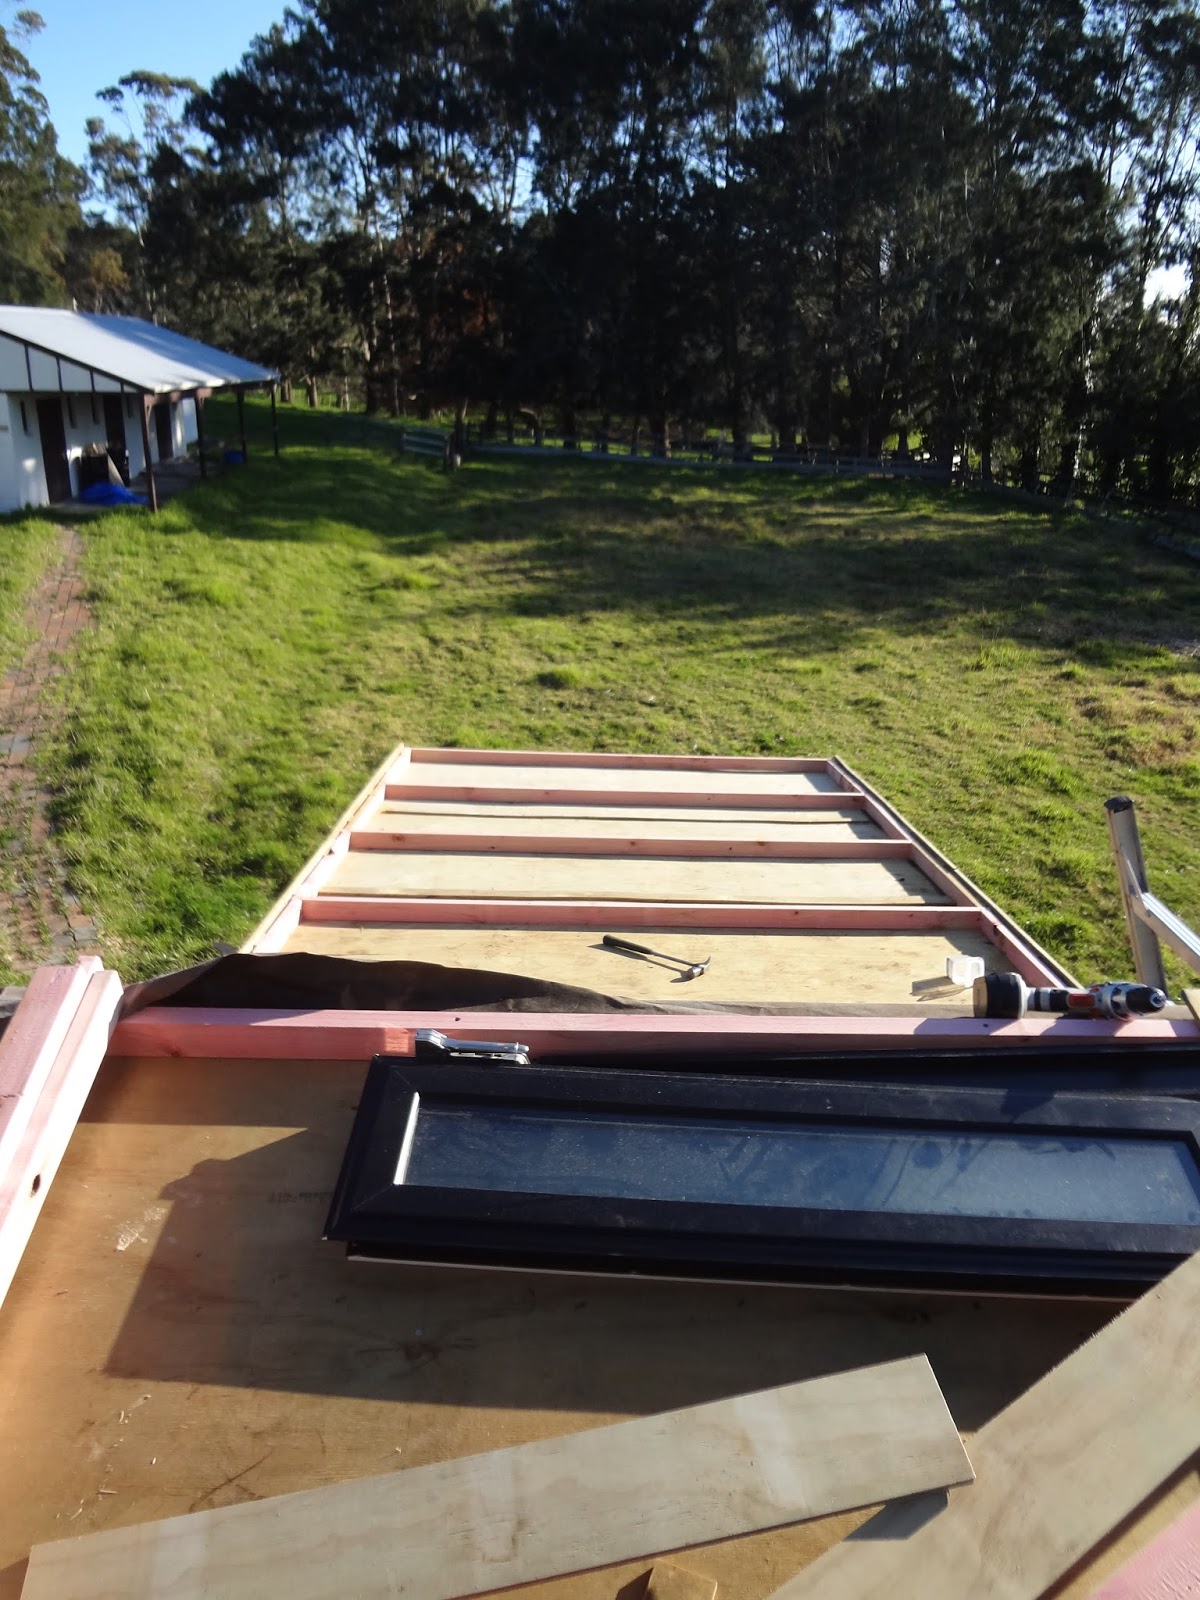
View from the top.  

Layers, right to left: ceiling insulation, building paper, iron to top the roof sandwich.

First roof, positioned and screwed down

A frosty start to day three

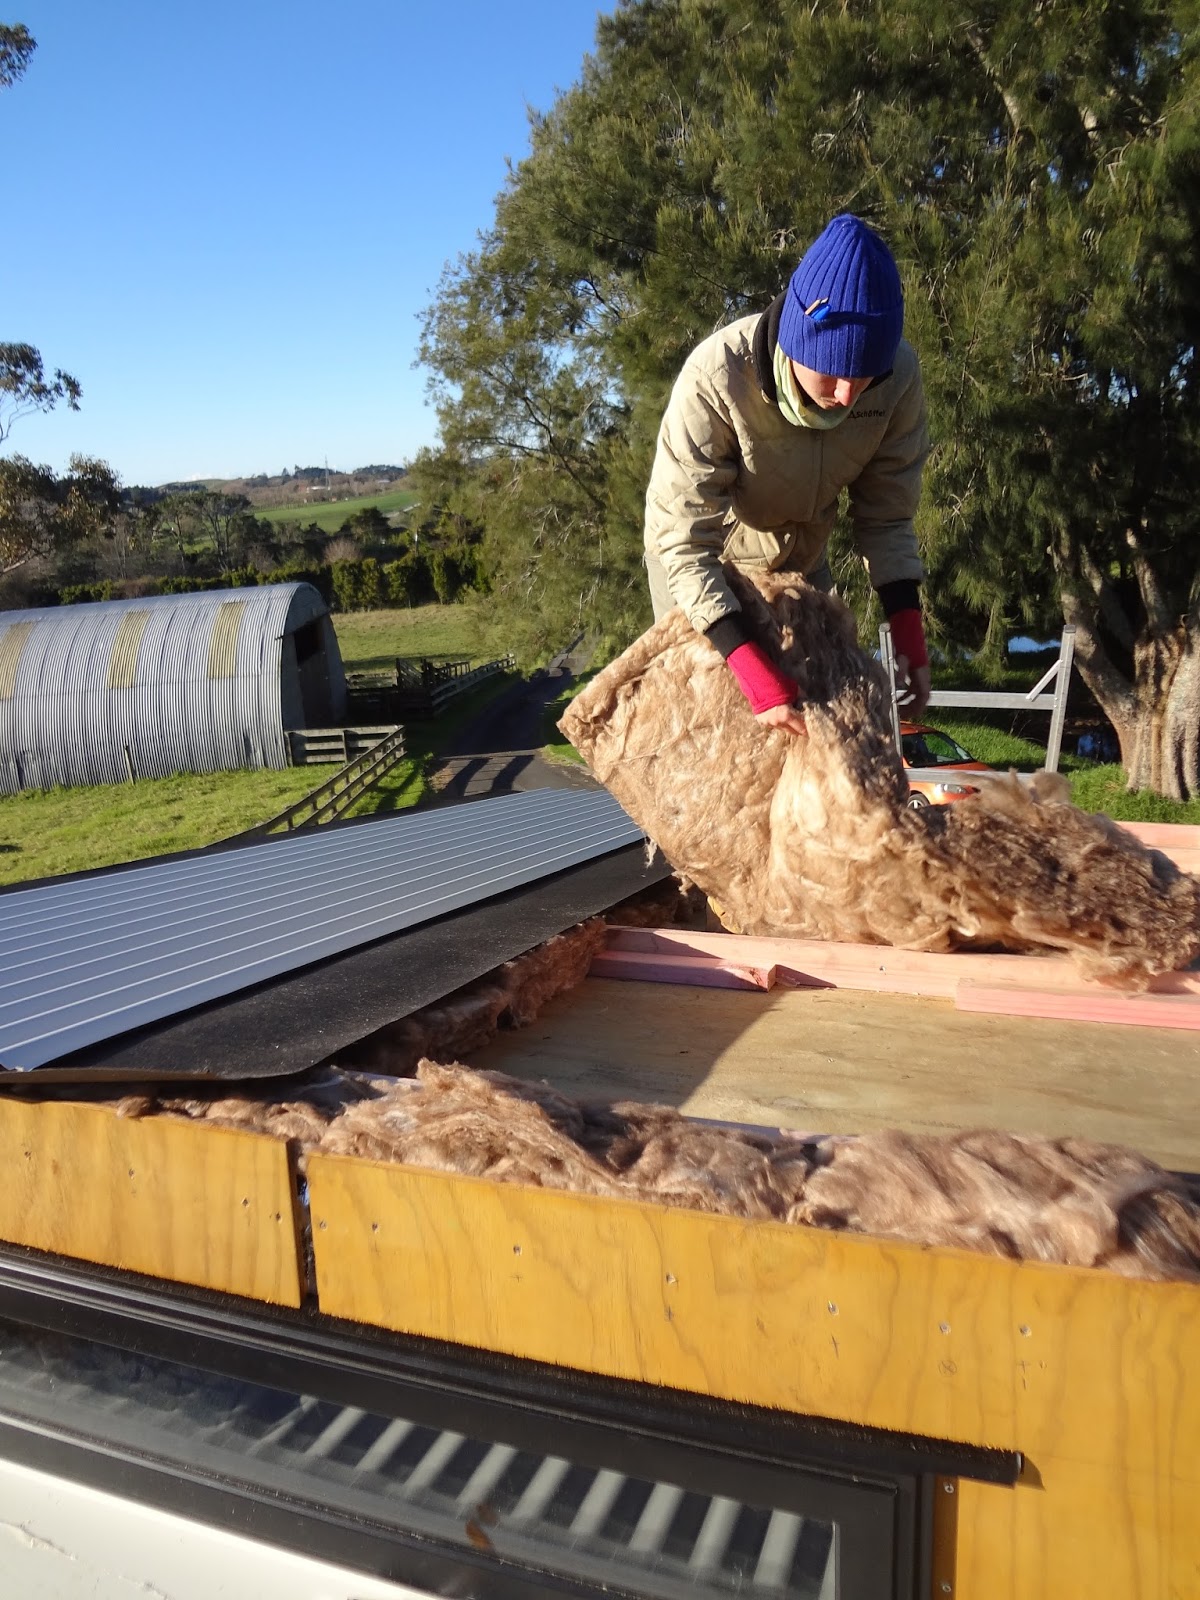
Steff positions the insulation

David stays safely on the ground. Note: aforementioned APRON flashing.


As the sun dipped behind these casuarina trees, it became intolerably cold.
We had to stop what we were doing immediately before we lost our heads and our dexterity to the chill.

The team hard at work

David doesn't like ladders either

The roof needed to be swept to remove any shrapnel that may have burst forth from the iron
while it was being screwed down. Barge flashings are now in place

We brought our builder friend back in to teach us how to put the first roof in place, and he left us to our own devices to complete the project. Due to a fear-induced measurement miscalculation and cumulative error, our second roof is now on very slightly askew. Our friend, when he came back to check it for us, described it as "a bit on the piss, but watertight".

Watertight. After months of battling the elements, tarpaulins blowing rampant in winter storms, waiting on overdue windows, and watching as torrents of water streamed onto months of hard work, we were enclosed and dry. This was a major achievement for us, and cleanly closed a chapter of the build.


From now almost until the end, we'll be inside.


Creative Commons License
The Quest Quotient by Nancy Howie and Steff Werman is licensed under a Creative Commons Attribution-NonCommercial-NoDerivs 3.0 Unported License.
Based on a work at thequestquotient2011.blogspot.com.

Thursday, September 24, 2015

Windows to the Soul

Yeah, we know. It's been a while. The thing is, we had a break from the blog in order to get a lot done on the house.  Now, consequently, we have plenty to write about. Let's start with the windows.

Here's where we are in the blog narrative: we have a house with great gaping holes in it. When it rains our interior looks like this:

More of a swimming pool than a dining room

When we describe our blog to interested persons, they often say to us, "so it's a how-to blog?" We're quick to correct them--this blog is more of a how-not-to.  Here's how not to do windows:

Do not cut window holes in your cladding before you've learned to install windows. 

Do not make the window holes in your cladding too large for the custom windows you have ordered, for you will have weathertightness issues.

Do not trust the professional who measured up your windows to inform you that you've made this grave error. 

With that in mind, here's how we corrected our window mishaps. The first step was to admit to ourselves that we had no idea how to install windows and that we needed help. We enlisted a professional builder to coach us and work alongside us so that we could eventually install a window or two ourselves. Here are some photos of that process.

Preparing a head flashing. This is installed above the window but behind the cladding to divert water away from the house-hole.

Attaching bitumen tape around the window corners--helps to weather-proof the window's weak points.

Steff framed in the unfinished window. Beware the tape's blinding reflective powers.

We originally built the framing for the following window around an old timber-framed leadlight jobbie. Its frame was wonky at best, so we ended up discarding it; this meant that we had to square up our framing so that the new custom window would fit. 
 

Steff secures some side-flashings (to cover up the oversized
cladding holes we mistakenly cut before window installation. Whoops).

Window installed and framing de-wonkified.

The side-flashings were tucked under the exterior window lip on bottom and sides and nailed in place.
They will eventually be covered by battens, in theory.

We had more framing changes at this point. We raised the window to accommodate a roof flashing. This flashing would be tucked under the window and would prevent splashback from driving rain on our low-angled roof. Regrettably, we can't specify the type of flashing as we've forgotten its name. We do know that it is not called a 'skirt flashing', or at least, we now know that's a phrase that shouldn't be Googled.

Yes, that's ice on the roof. Dry winter days made for frosty nights (but also maximum productivity on the house-building front!)

Back inside, we're poking styrofoam backing rod in the gaps between the window and the framing.
This stops our expanding foam from squirting through the gap and out to the exterior cladding.

Backing rod installation party

This is what we mean by expanding foam. It was chaos, and we were applying it without finesse. The foam came out at one speed only, and that speed was uncontrollably fast. There was much surprised whooping, and it was eventually tracked throughout the house. We started out trying in earnest to clear up our colossal mess, but ended up sculpting phalluses out of the foam instead.


More expanding foam glamour shots. After the foam has hardened, we cut it off flush
with a razor knife. Ignore the insulation; we'll get to that later.

Next up: we put a roof on this puppy!


Creative Commons License
The Quest Quotient by Nancy Howie and Steff Werman is licensed under a Creative Commons Attribution-NonCommercial-NoDerivs 3.0 Unported License.
Based on a work at thequestquotient2011.blogspot.com.

Tuesday, June 30, 2015

The Importance of Being Idle


When we started up this blog/build earlier this year, the average house price in Auckland was around $700,000; the local paper reported last week that the average house price is now around $828,000. This little bit of news proved to be a bit of a morale booster, a reminder of why we're doing this, especially in light of the speed bump we hit about seven weeks ago.

Let's back up a bit. At the last report, we had completed the framing. To help brace and weatherproof the structure, we tacked our plywood cladding in place. Good friends came to help us with the process, which meant we had the whole thing done in a day. Thanks, good friends!

How to accurately measure around a wheel well: stick Steff in there!

Steff's claustrophobic POV

Worksite health and safety always comes first when the skill saw is in use.

Sticky nasty bitumen paper goes up


We only attached the plywood temporarily, because it had to come back off at such a time as we were ready to put our windows in place. Ah, the windows. Our first major drama.

We knew that the windows would take a while to produce, because the manufacturers had informed us we'd have a two-week wait after they were custom-measured and ordered by a member of their staff. But upon ordering, our two-week wait became a five-week wait. This was a bit disappointing, given that we had picked up some momentum as we'd worked on the framing, but Steff was due to be out of town on a course for three weeks, so we'd have been short a pair of hands anyway. Steff's course was about an eight hour drive from home. Because we were short of work to do on the house, and we weren't shackled to our city rental payments any more, we realised we had the freedom to take some time to explore the country on the way down. ROAD TRIP!


Wild horses


Sunset/moonrise (click to enlarge)

Post-road-trip, Nancy drove home to Auckland, and she and her father picked up what work they could without windows. Installing the roof and finalising the cladding were contingent on window installation. Because the roof couldn't be installed without the windows, the building wasn't yet watertight. And because it was raining inside the house, none of the interior fit-out could be started either. It was at this point that they realised the hole for the door was too small...

Taking to the old doorway with a hand saw

We also made a start on the stairs, which thoroughly did our heads in. 


It looks easy, but it took us about four full days before this tangle of plywood began to resemble a staircase.

The stair-tops aren't in place yet, because the timber for them isn't treated, and rain features heavily in our
interior design at this stage.

Meanwhile, Steff was learning to make amazing things.


I attended a month long internship at Koanga Institute, well-known for their fantastic work saving heritage seeds and fruit trees of NZ.

We delved into "Appropriate Technology", which our tutor, Tim Barker, defined as: technology which is human-centred and human-scaled; easy to understand and replicate; focusing on locally available resources; requires labour input to create but is energy-efficient and affordable.

Used metal drums are an abundant resource that can be reused in
 many projects

We studied passive heating and cooling; climate-appropriate house design; home-scale biochar production; super efficient rocket stove wood burners; water pumps; human powered machines; small scale solar, hydro and wind power; and appropriate biotechnology - biological greywater systems and composting toilets.

Large scale solar oven getting lots of food cooked.

We built a huge solar oven for the institute which acts as a free slow cooker whenever the sun is shining. Using the same principles we made a solar hot water system. We set lots of things on fire and built a rocket stove-powered cooktop.

Home-scale TLUD biochar burner and 30 minute cookstove.
Transform small batches of waste bones and wood into a soil
amendment while making a hot breakfast and coffee outdoors!

Guts of a rocket stove - super efficient wood-burning
technology with wide applications.

Gardening, soil stewardship, nutritious food, voluntary simplicity and learning to live with healthy community relationships were constant background conversations. Living, working and learning with like-minded people, all choosing to take positive action in response to our current ecological, economic and social challenges, was an inspiring and motivating experience.


Stay tuned for updates about how we are applying appropriate technology in our house and around the farm. For those interested we'll have detailed posts when our solar oven, rocket powered BBQ, solar hot water system, greywater, composting toilets get up and running.

-Steff

Meanwhile, back in Auckland, around four and a half weeks after ordering the windows, we hadn't yet heard anything from the company, despite us contacting them regularly. Having paid a (large) deposit, we started to get a bit nervous. Nancy called the suppliers, who admitted they had forgotten to put our order through in the first place. They informed us it would be yet another two weeks before we received our windows. However, after a call to the director of the company and a request for a refund, our windows magically turned up within a few days.

Between placing our order and having our windows ready to install was essentially seven weeks of down time. Before we started our build, people had warned us that there would be times where progress was frustratingly slow, and this was one of them. Despite being available to continue with our project during those seven weeks, we had no option but to watch as warm, sunny autumn days turned to persistent rains.

There's good news, though. After those seven weeks, this happened:

Before...


After!
Creative Commons License
The Quest Quotient by Nancy Howie and Steff Werman is licensed under a Creative Commons Attribution-NonCommercial-NoDerivs 3.0 Unported License.
Based on a work at thequestquotient2011.blogspot.com.