Nancy: To be fair, I wasn't just pretending to be busy at this time. It is worth noting at this point that there is a lot involved in keeping the project moving. It helps to have a basic itinerary (anything more specific will be laughed at by the fates, and quickly demolished by unforeseen problems), and to have all the building materials in advance. We've wasted many days to unplanned trips to the hardware store. Even something as simple as a missing box of screws can cause the build day to come to a grinding halt.
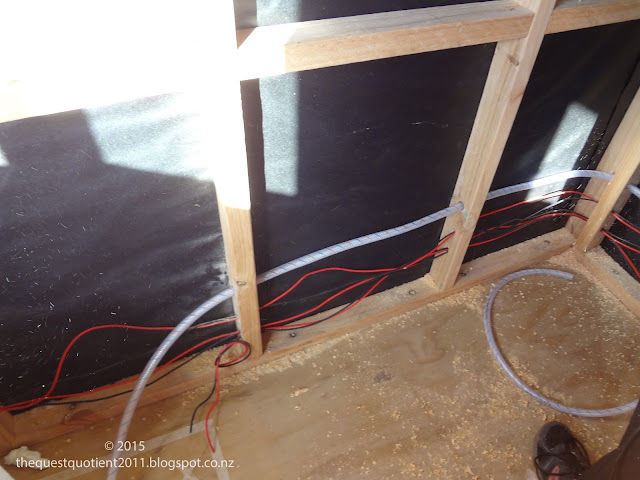
Nancy also helped cut holes in the framing, generating an unholy mess. David demonstrates this below.
 |
| The first step is to create as much sawdust as possible... |
 |
| ...And cover everyone in it! |
It was quite the mental exercise to work out switches and parallel circuits.
 |
| Chocolate boxes |
We chose to have our house running primarily on a 12 volt system, mainly because 12 volt systems are safe to work with and do not require professional installation. You'll still know all about it if you receive a shock from a live 12v wire, but it won't necessarily be fatal. For this reason, having a 12v system made it easier for us to be off-grid.
However, we thought it would be prudent to run a 240v system alongside our humble 12v one, as a just-in-case. We had at the beginning of the project made the decision not to tackle tasks that could result in certain death in the event of a mistake, especially as we're really good at mistakes. For this reason, we hired an electrician to wire up the 240v system and install a caravan-style power hookup.
 |
| 240 powerpoints installed by electrician |
 |
| Wires hanging from every which-where |
All of the wires lead back to a central location under the stairs where we'll install our circuit breaker panel and solar system.
 |
| The business end: future location for circuit breaker panel. |
The last stage of this part of the project was testing all of the circuits. This was not only to confirm our genius and boost our self-esteem, but also because it'd be a real pain in the arse to attach all the lining to the walls, only to discover that the stereo wouldn't come on, or the water pump wouldn't work.
 |
| Hallelujah! |
 |
| Rage, rage against the dying of the light! |
Thus ends phase one of our wiring. We will revisit this system later in the story. But for now, we move onto...
Insulation
We had a range of insulation options available to us. We conducted a lot of research and found that we could opt for recycled spun plastic as an alternative to fibreglass. The plastic is recycled, locally produced, and easier to work with than itchy glass insulation. In the end, though, we went with fibreglass. This was in part due to budget constraints, but mostly because Pink Batts is what the local store had on the day that we needed to make an immediate decision on the matter. Besides, who could resist this adorable targeted advertising? We were had by a good marketing team.
Insulation installation (say that five times fast) is apparently a job that you can hire professionals to do. We're not certain why you'd need a professional, but we suspect it has to do with not inhaling potentially carcinogenic dust...
Here we are, installing insulation!
 |
| We split our batts in half |
 |
| Handkerchiefed (for safety!) |
Steff worked on installing the insulation for a few hours here and there, splitting the batts, cutting them to size and fitting them in place.
 |
| Steff: It was rather meditative (read, monotonous) and it felt like I was gently tucking in the house. |
 |
| Fiberglass insulation technology has apparently improved in leaps and bounds, but Steff still covered exposed skin to avoid itchies. |
 |
| The house grew notably warmer and quieter (and drier!) as Steff worked her way around the house |
We used two bags of insulation for the whole house. In one bag the Batts were saturated in a mystery purple chemical. We trimmed those parts off and tried our best not to get it on everything.
 |
| Trimming Batts to size, and cutting off gross drippy bits |
 |
| Any ideas what this stuff is? Some of our insulation was saturated in it. |
 |
| It stained everything |
From insulation, we progressed on to
Plumbing
While we had initially intended to use standard plumbing pipes, we decided to use marine flexi hose. This is because of the situation detailed in the cartoon below. Please note that the situation did literally happen as depicted in the cartoon, at a plumbing place in the north end of town that we probably shouldn't name for legal reasons (the name starts with "m"!):
David, unfamiliar with the subtle nuances of a patriarchal society had his mind blown by this scenario, and in fact was the one using the deleted expletives, and fluently at that. He often recounts the story now, still amazed that this situation even took place. Other men are shocked. Women are thoroughly unsurprised.
 |
| Marine drinking hose (more holes in the wall) |
 |
| Hose clamps (because it's not a great idea to drip water into the walls of your house) |
 |
| Smile for the camera! |
 |
| Hot and cold hoses separated, to be connected to our califont outside. |
 |
Future wet zones, kitchen and bathroom
|
Coming up next: we build some stairs and put up some interior walls!
The Quest Quotient by Nancy Howie and Steff Werman is licensed under a Creative Commons Attribution-NonCommercial-NoDerivs 3.0 Unported License.
Based on a work at thequestquotient2011.blogspot.com.


